Tutorial
After downloading and installing Clash for Windows, you can configure it using the Clash for Windows Usage Tutorial.
Add Configuration File
There are generally two ways to add configuration files:
- Remote subscription URL
- Local configuration file
Generally, both remote subscription URLs (URL import) and local configuration files (drag and drop import) are provided by node service providers.
Remote Subscription URL
Remote subscription URL means importing via URL link. Most providers will directly provide a Clash node address. Simply copy the node subscription URL provided by the provider, as shown below:
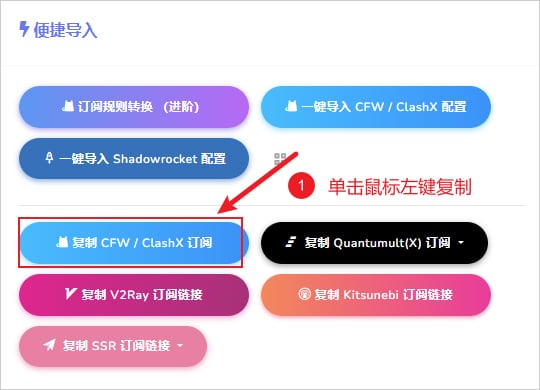
Remote Subscription URL Example
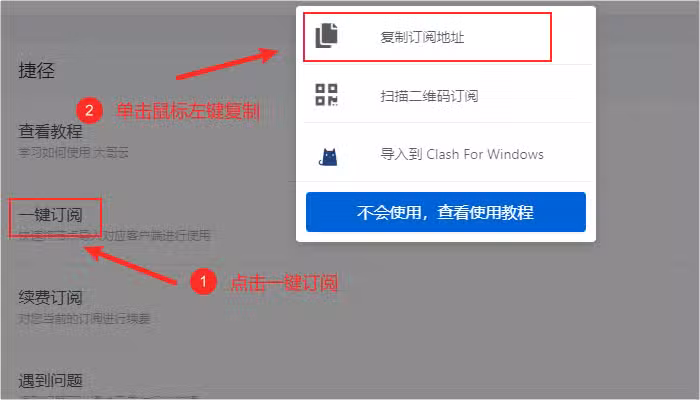
Copy Subscription Link
Then click Profiles in the left menu, paste the copied URL in the top input field and click Download. After downloading, click the corresponding configuration file to add it, as shown below.
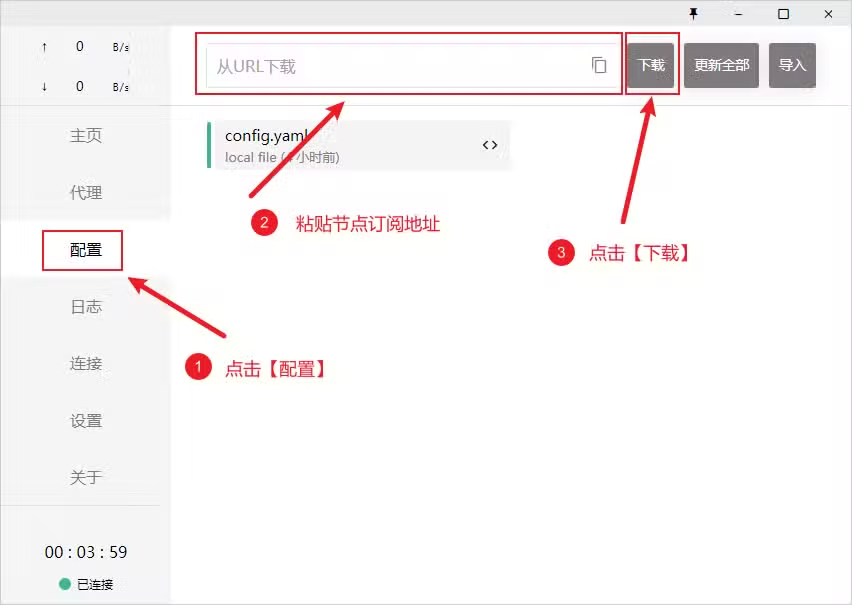
URL Import Configuration
Local Configuration File
Local configuration file means importing via drag and drop. This is used when remote subscription URL import is not available. You can download the configuration file in the browser and import it directly by dragging or clicking Import, as shown below.
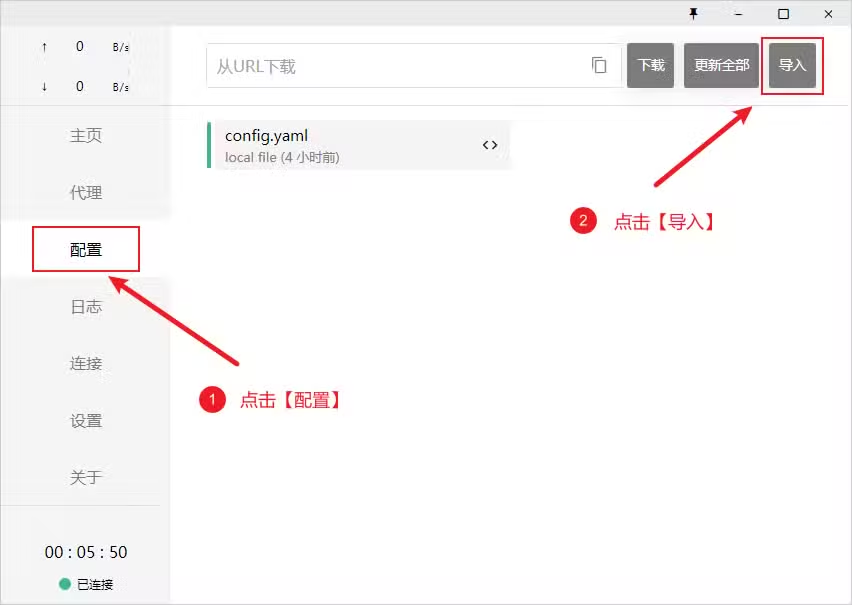
Local Configuration File Import
Select Proxy Node
After adding a subscription URL, you need to select a proxy node to use. Click the Proxies tab on the left side of the software interface. Keep the proxy rules at the top right as Rule by default. There are mainly four proxy modes:
- Rule: All requests are routed according to configuration file rules
- Global: All requests are sent directly to the proxy server
- Direct: All requests are sent directly to the destination, i.e., without using a proxy
- Script: All requests are routed according to script file rules
Global mode may cause domestic traffic to also go through the proxy, which not only slows down the network but also consumes plan traffic. The benefit of Rule mode is that it distinguishes between domestic and foreign traffic, and only foreign websites within the rules will go through the proxy. This doesn't affect domestic access speed and saves plan traffic, so Rule is generally recommended unless you have special requirements.
Then simply click any node in the expanded node group, as shown below:
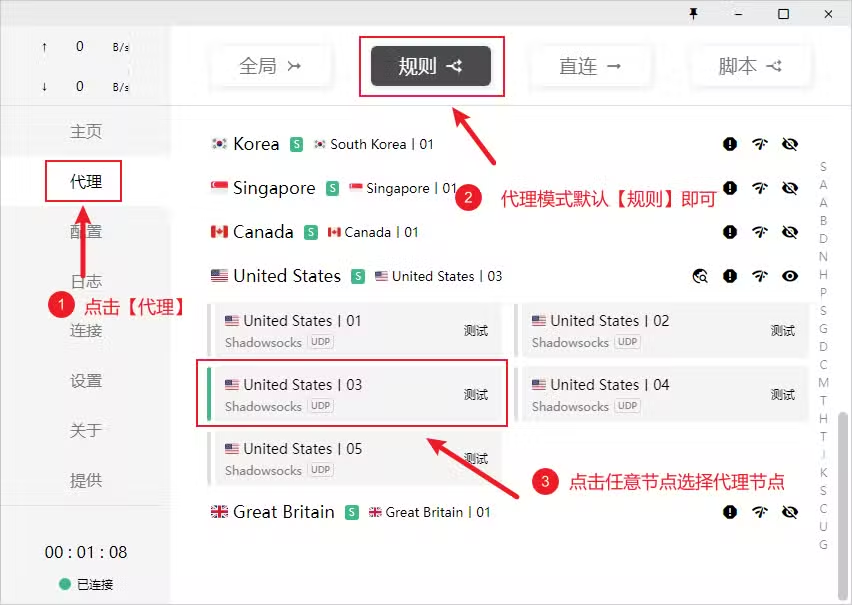
Select Proxy Node
Enable Proxy
To enable the proxy, click the General tab in the left menu, find System Proxy and turn on the switch. When enabled, the button status is green, as shown below.
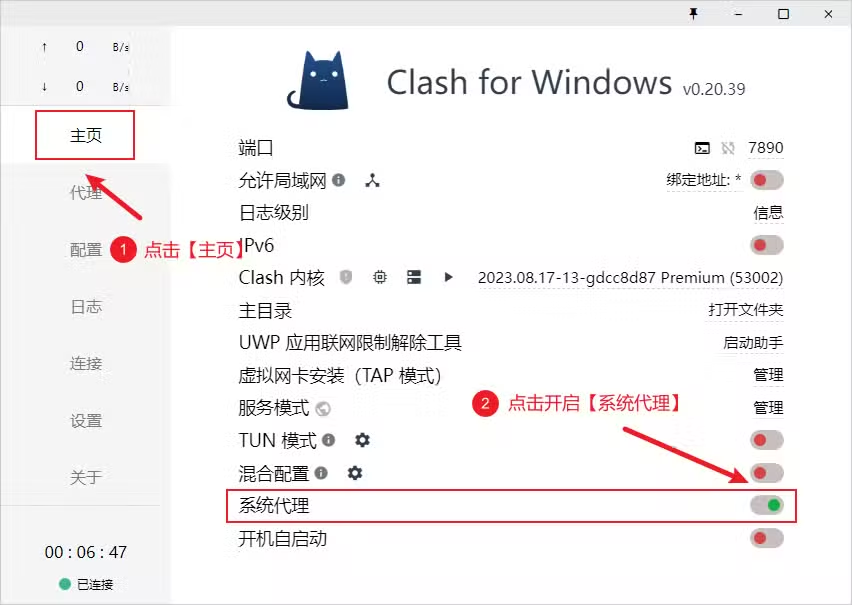
Enable System Proxy
After starting the proxy, the system tray icon will turn golden. Below is an explanation of the system tray icon colors.

System Tray Icon Explanation
Set Auto-start on Boot
To set auto-start on boot, click the General tab in the left menu, find Auto Start and turn on the switch. When enabled, the button status is green, as shown below.
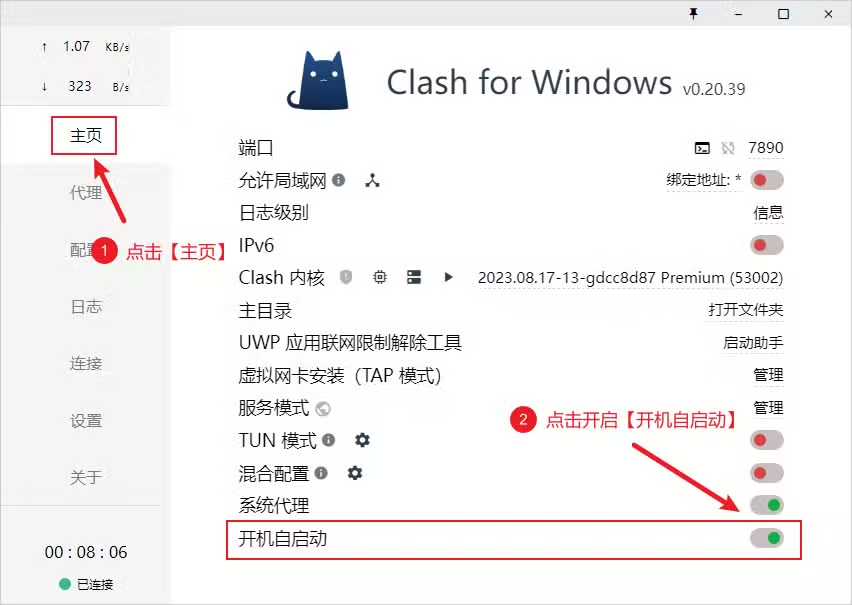
Set Auto Start
Update Configuration File
Click Profiles in the left menu, then click Update All to update all configuration files, as shown below.
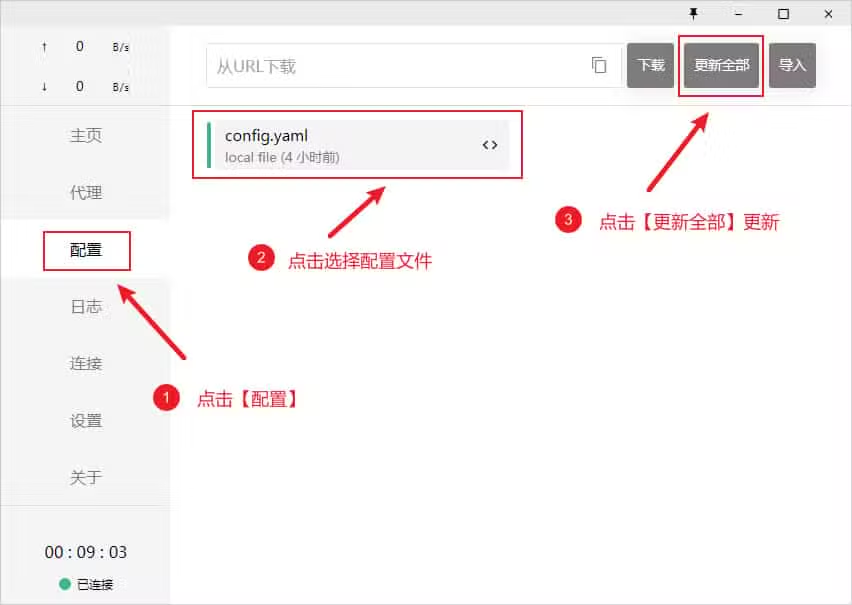
Update Configuration File